There’s something magical about the moment when you flip a pineapple upside down cake onto a serving plate. The caramelized fruit that’s been bubbling away at the bottom of the pan now crowns your creation, glistening with sweet syrup. This retro dessert has stood the test of time for good reason – it’s not just visually stunning, but it delivers an irresistible combination of buttery cake with caramelized fruit that continues to delight generations of dessert lovers.

As someone who’s been baking this classic treat for over two decades, I’ve perfected techniques that ensure a moist, flavorful cake every time. Whether you’re attempting your first pineapple upside down cake or looking to elevate your tried-and-true recipe, this comprehensive guide will walk you through everything you need to know – from selecting the perfect ingredients to serving suggestions that will wow your guests.
The Rich History of Pineapple Upside Down Cake
Before we dive into the recipe, let’s appreciate the fascinating journey of this beloved dessert. Upside down cakes themselves weren’t a novel concept – they’ve existed for centuries in various forms, with bakers placing fruit at the bottom of their cake pans since medieval times. However, the pineapple version we know today has a distinctly American origin story.
The pineapple upside down cake as we recognize it emerged in the early 20th century, coinciding with two significant developments. First, Jim Dole’s Hawaiian Pineapple Company (now Dole Food Company) revolutionized the fruit market by making canned pineapple widely available to the American public. Second, the invention of the maraschino cherry in the late 19th century provided the perfect decorative garnish.
By the 1920s, pineapple upside down cake had become a fixture in American households, with recipes appearing in cookbooks and women’s magazines nationwide. Its popularity soared during the mid-20th century, becoming the epitome of hospitality desserts – impressive yet achievable for home bakers.
Why This Recipe Works
What makes this particular recipe stand out from countless others? Here’s why you can trust this method:
- Perfectly Balanced Sweetness: The cake itself isn’t overly sweet, allowing the caramelized pineapple topping to shine
- Moist, Tender Crumb: The addition of sour cream creates an exceptionally tender texture
- Foolproof Technique: Detailed instructions ensure your cake releases perfectly every time
- Versatile Base Recipe: Easy to customize with different fruits or flavor additions
Let’s explore the ingredients that make this cake special before diving into the preparation.
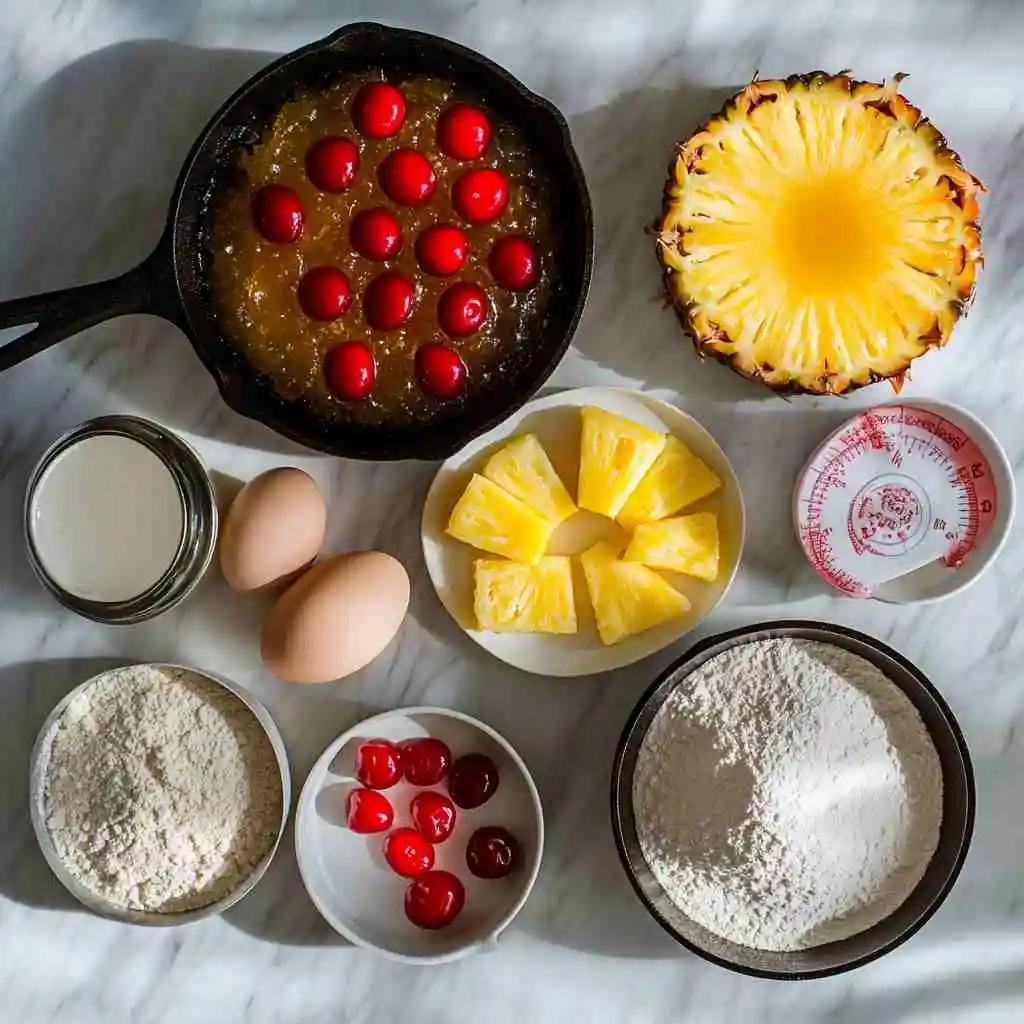
Ingredients: Quality Matters
For the Topping:
- 4 tablespoons (½ stick) unsalted butter: Using unsalted butter allows precise control over the salt content. The butter should be at room temperature for easy spreading.
- ⅔ cup packed light brown sugar: Light brown sugar contains molasses, which creates that perfect caramel flavor without overwhelming the fruit. Always pack it firmly when measuring.
- 1 can (20 oz) pineapple rings in juice (not syrup): Pineapple in juice rather than heavy syrup ensures a more natural fruit flavor and balanced sweetness.
- Maraschino cherries: These provide the classic decorative touch and a pop of color. Look for ones without artificial dyes if possible.
- Optional: 2 tablespoons dark rum or 1 teaspoon vanilla extract: A small amount of rum or vanilla enhances the tropical flavors.
For the Cake:
- 1½ cups all-purpose flour: Provides structure without being too heavy.
- 1½ teaspoons baking powder: For proper rise.
- ¼ teaspoon salt: Enhances all flavors in the cake.
- 8 tablespoons (1 stick) unsalted butter, softened: Room temperature butter is essential for proper creaming with sugar.
- 1 cup granulated sugar: Creates tenderness and sweetness in the cake base.
- 2 large eggs, room temperature: Room temperature eggs incorporate more easily into the batter.
- 1 teaspoon vanilla extract: Adds depth of flavor.
- ½ cup sour cream: The secret ingredient that ensures a moist, tender crumb.
- ¼ cup pineapple juice (reserved from the canned pineapple): Reinforces the pineapple flavor throughout the cake.
Essential Equipment
Before beginning, gather these tools:
- 9-inch cast iron skillet or cake pan: Cast iron conducts heat beautifully for caramelizing the topping, but a regular cake pan works well too.
- Stand mixer or hand mixer: For properly creaming butter and sugar.
- Mixing bowls: At least two – one for dry ingredients and one for wet.
- Measuring cups and spoons: For accurate measurements.
- Spatula: For folding and scraping the sides of the bowl.
- Cooling rack: Essential for the proper cooling process.
Step-by-Step Instructions
Preparing the Topping
- Preheat your oven to 350°F (175°C): Starting with a properly preheated oven ensures even baking.
- Prepare the pan: If using a cake pan instead of cast iron, grease it thoroughly. For cast iron, you’ll melt the butter directly in it.
- Create the caramel base:
- Place your cast iron skillet over medium-low heat. Add the 4 tablespoons of butter and melt completely.
- Once melted, add the brown sugar and stir until it dissolves into the butter, about 2-3 minutes.
- If using rum or vanilla, add it now and stir to incorporate.
- Remove from heat once the mixture is smooth and bubbling slightly.
- Arrange the pineapple and cherries:
- Drain the pineapple rings, reserving ¼ cup of juice for the cake batter.
- Place a single pineapple ring in the center of the pan.
- Arrange the remaining rings around it in a circular pattern.
- Place cherries in the center of each pineapple ring and in any gaps between them.
Making the Cake Batter
- Combine dry ingredients: In a medium bowl, whisk together the flour, baking powder, and salt. Set aside.
- Cream butter and sugar:
- In a large bowl or stand mixer, beat the softened butter on medium speed until creamy, about 1 minute.
- Gradually add the granulated sugar and continue beating until light and fluffy, about 3-4 minutes. Don’t rush this step – proper creaming incorporates air that helps the cake rise.
- Scrape down the sides of the bowl as needed.
- Add eggs and vanilla:
- Add eggs one at a time, beating well after each addition.
- Beat in the vanilla extract.
- The mixture may look slightly curdled at this stage – that’s normal.
- Incorporate dry ingredients and wet ingredients:
- Reduce mixer speed to low.
- Add about one-third of the flour mixture and mix until just combined.
- Add half the sour cream and mix gently.
- Continue alternating, ending with the flour mixture (flour-sour cream-flour-sour cream-flour).
- Finally, gently stir in the reserved pineapple juice until just combined. Be careful not to overmix.
Baking and Finishing
- Pour and spread batter:
- Gently pour the batter over the arranged pineapple and caramel.
- Carefully spread the batter evenly to the edges with a spatula.
- Bake:
- Place in the preheated oven and bake for 40-45 minutes, or until a toothpick inserted in the center comes out clean or with a few moist crumbs.
- The top should be golden brown and spring back when lightly touched.
- Cool and invert:
- Remove from oven and let cool in the pan for exactly 10 minutes – no more, no less.
- Run a knife around the edge of the cake to loosen it.
- Place a serving plate upside down over the top of the pan.
- Using oven mitts (the pan will still be hot), carefully but confidently flip the cake and plate together in one quick motion.
- Leave the pan in place for about 30 seconds to allow the caramel to drip down onto the cake.
- Gently lift the pan. If any fruit sticks to the pan, carefully remove it and place it back onto the cake.
- Serve:
- Allow to cool slightly before serving.
- The cake is delicious warm or at room temperature.
Troubleshooting Common Issues
Even experienced bakers encounter challenges. Here’s how to address the most common problems:
The Cake Didn’t Release Properly
If pieces of your cake stick to the pan:
- Make sure you’re inverting the cake while it’s still warm (after exactly 10 minutes of cooling).
- If using a regular cake pan, ensure it’s well-greased with butter before adding the caramel mixture.
- Next time, line the bottom with parchment paper for extra insurance.
The Topping Is Too Runny
If your topping spreads too much when inverted:
- The cake may have been slightly underbaked.
- You might have used pineapple in heavy syrup rather than juice.
- Allow the cake to set for about 10-15 minutes after inverting before slicing.
Dry or Dense Cake Texture
If your cake turns out dense:
- You may have overmixed the batter. Mix just until ingredients are incorporated.
- Check your baking powder – it should be fresh (less than 6 months old).
- Make sure your butter and eggs were at room temperature.
Creative Variations
While the classic recipe is always a crowd-pleaser, try these exciting variations:
Different Fruits
- Tropical Twist: Replace some pineapple rings with mango slices or peach halves.
- Berry Beautiful: Add fresh berries in the spaces between pineapple rings.
- Stone Fruit Surprise: In summer, try using plums or apricots for a seasonal treat.
Flavor Enhancements
- Coconut Infusion: Add ½ cup shredded coconut to the batter and substitute coconut milk for the pineapple juice.
- Spice It Up: Add ½ teaspoon cinnamon and ¼ teaspoon nutmeg to the batter for warming notes.
- Brown Butter Upgrade: Use brown butter instead of regular butter in the cake for a nutty, caramelized flavor.
Serving Suggestions
Transform this classic cake into a remarkable dessert with these serving ideas:
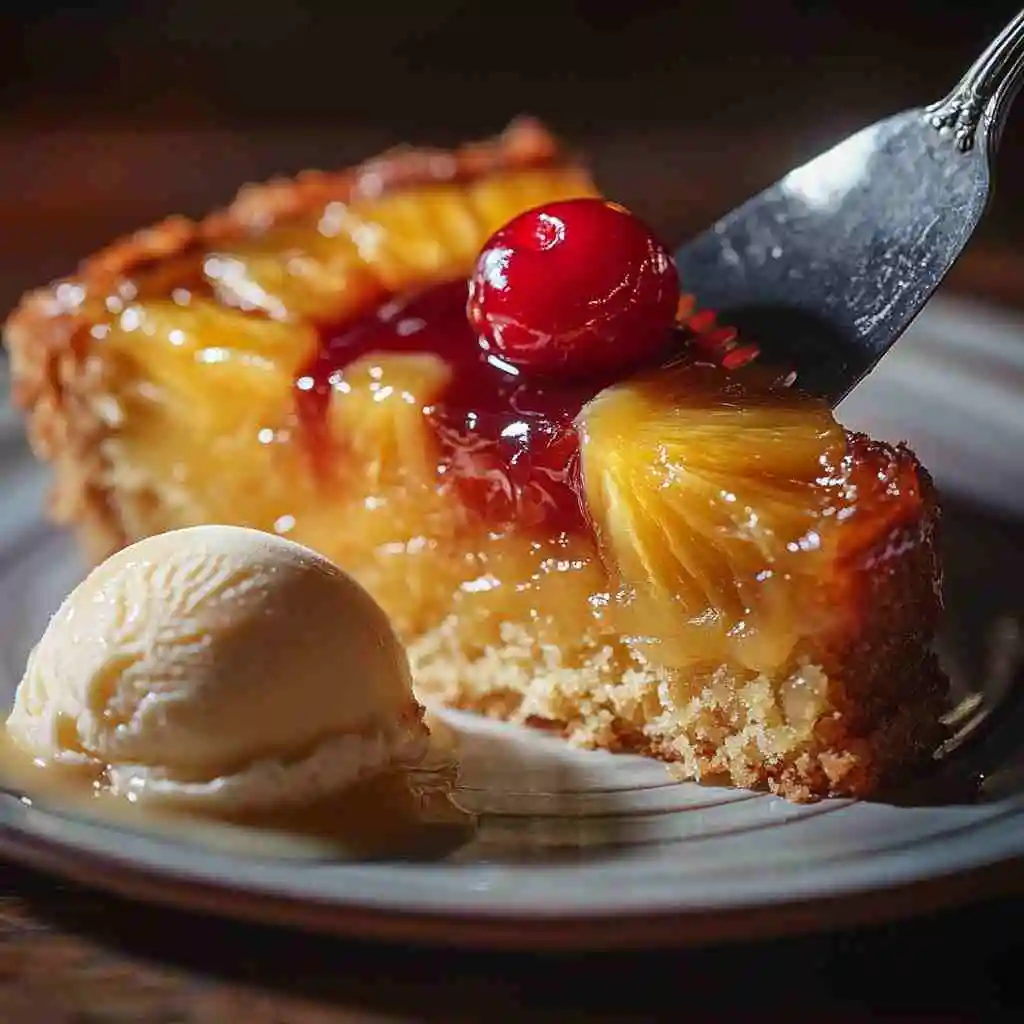
- À la Mode: Serve warm with a scoop of vanilla ice cream.
- Whipped Cream Cloud: Top with freshly whipped cream infused with a touch of rum.
- Caramel Drizzle: Drizzle with additional warm caramel sauce for extra decadence.
- Coconut Garnish: Sprinkle toasted coconut flakes around the perimeter of the cake.
Make-Ahead and Storage Tips
Pineapple upside down cake is always best served fresh, but there are ways to work ahead:
- Same-Day Preparation: The cake can be made up to 8 hours ahead and kept at room temperature, covered loosely with foil.
- Refrigeration: If needed, refrigerate for up to 3 days. Bring to room temperature before serving or warm individual slices briefly in the microwave.
- Freezing: This cake can be frozen for up to 2 months. Thaw overnight in the refrigerator, then bring to room temperature before serving.
Nutritional Benefits
While pineapple upside down cake is certainly a treat, it does offer some nutritional benefits:
- Pineapple contains vitamin C, manganese, and bromelain (an enzyme with anti-inflammatory properties).
- Using ingredients like eggs and sour cream adds protein and calcium.
- Moderate portion sizes make this a reasonable dessert option when enjoyed as part of a balanced diet.
A typical slice (1/10th of the cake) contains approximately:
- Calories: 320
- Fat: 14g
- Carbohydrates: 48g
- Protein: 3g
- Fiber: 1g
Expert Tips for Success
After years of perfecting this recipe, I’ve gathered these professional insights:
- Room temperature ingredients: This cannot be stressed enough – cold eggs or butter will not incorporate properly.
- Don’t rush the caramel: Allow the butter and brown sugar to melt together slowly for a smooth, not grainy, result.
- Perfect your flip: The key to a successful inversion is confidence. Make sure your serving plate is centered, then flip quickly and decisively.
- Consider your pan: Dark metal pans and cast iron conduct heat differently than light-colored pans. You may need to reduce baking time by 5 minutes with dark pans.
- Fresh ingredients: While canned pineapple is traditional, using the highest quality ingredients will elevate your cake.
Frequently Asked Questions
Can I use fresh pineapple instead of canned?
Yes, but it requires extra preparation. Fresh pineapple contains enzymes that can break down proteins and affect the texture of your cake. To use fresh pineapple:
- Cut into rings approximately ½-inch thick
- Briefly cook the pineapple in a simple syrup (equal parts sugar and water) for about 2 minutes
- Pat dry before arranging in the pan
Can I make this cake gluten-free?
Absolutely! Replace the all-purpose flour with a high-quality gluten-free 1:1 baking flour blend. The rest of the recipe remains the same.
Why is my cake soggy in the middle?
This usually indicates underbaking. Ovens vary in temperature, so always test with a toothpick. If your toothpick comes out with wet batter, continue baking in 3-5 minute increments until done.
Can I make mini pineapple upside down cakes?
Yes! Use a muffin tin, placing a pineapple ring (or cut rings into smaller pieces) at the bottom of each cavity with a bit of the butter-sugar mixture. Reduce baking time to about 20-25 minutes.
Final Thoughts: Why Pineapple Upside Down Cake Endures
The enduring popularity of pineapple upside down cake speaks to our collective love of desserts that balance simplicity with spectacle. Each time you flip that pan to reveal the glistening fruit arrangement, you’re participating in a culinary tradition that has delighted generations.
What makes this particular recipe special is its versatility. It’s equally appropriate served at a casual family dinner or dressed up for a special celebration. The contrast between the moist, tender cake and the sweet caramelized fruit creates a perfect balance that appeals to almost everyone.
I hope this comprehensive guide helps you create a pineapple upside down cake that becomes a treasured recipe in your collection. Remember that baking is both a science and an art – once you master the basics, don’t be afraid to make it your own with personal touches that reflect your unique taste and style.
Happy baking!

pineapple upside down cake
Notes
Ingredients: Quality Matters
For the Topping:
-
- 4 tablespoons (½ stick) unsalted butter
-
- ⅔ cup packed light brown sugar
-
- 1 can (20 oz) pineapple rings in juice
-
- Maraschino cherries
- Optional: 2 tablespoons dark rum or 1 teaspoon vanilla extract
For the Cake:
-
- 1½ cups all-purpose flour: Provides structure without being too heavy.
-
- 1½ teaspoons baking powder: For proper rise.
-
- ¼ teaspoon salt: Enhances all flavors in the cake.
-
- 8 tablespoons (1 stick) unsalted butter, softened: Room temperature butter is essential for proper creaming with sugar.
-
- 1 cup granulated sugar: Creates tenderness and sweetness in the cake base.
-
- 2 large eggs, room temperature: Room temperature eggs incorporate more easily into the batter.
-
- 1 teaspoon vanilla extract: Adds depth of flavor.
-
- ½ cup sour cream: The secret ingredient that ensures a moist, tender crumb.
- ¼ cup pineapple juice (reserved from the canned pineapple): Reinforces the pineapple flavor throughout the cake.
Instructions:
Preparing the Topping
- Preheat your oven to 350°F (175°C): Starting with a properly preheated oven ensures even baking.
- Prepare the pan: If using a cake pan instead of cast iron, grease it thoroughly. For cast iron, you'll melt the butter directly in it.
- Create the caramel base:
- Place your cast iron skillet over medium-low heat. Add the 4 tablespoons of butter and melt completely.
- Once melted, add the brown sugar and stir until it dissolves into the butter, about 2-3 minutes.
- If using rum or vanilla, add it now and stir to incorporate.
- Remove from heat once the mixture is smooth and bubbling slightly.
- Arrange the pineapple and cherries:
- Drain the pineapple rings, reserving ¼ cup of juice for the cake batter.
- Place a single pineapple ring in the center of the pan.
- Arrange the remaining rings around it in a circular pattern.
- Place cherries in the center of each pineapple ring and in any gaps between them.


